 Free UK delivery


Which Colour to Paint First on a Paint by Numbers Kit
Start with the lightest colours, then move through mid-tones and finish with the darkest shades, so pale sections stay clean and edges remain sharp. If you are wondering which colour to paint first on a paint by numbers kit, start with a pale shade such as cream, light yellow or soft blue, working in small sections and allowing each area to dry before covering nearby paint.
This approach keeps light areas free from smudges, prevents printed numbers from showing through darker paints, and helps you build even coverage across the canvas.
In short
- Start with the lightest colours on the canvas, not the darkest.
- Work in thin coats and let each area dry before moving to an adjacent colour.
- Save dark tones, outlines and fine detail for the later stages.
- If a number sits under a dark area, paint the light surrounding colour first and cover the number last.
## Which Colour Should You Paint First on a Paint by Numbers Kit?
Start with the lightest, palest colours on the canvas. Then work through the mid-tones, followed by the dark colours and outlines, with the smallest fine details saved for last.
Pale acrylic paint can be less opaque than darker colours, so it may need a careful, even coat to cover the printed number cleanly. Painting these areas while the surrounding canvas is still free from dark paint gives you a better chance of keeping pale sections bright. Dark paint can also spread into a light area if the brush carries too much moisture or colour, so leaving dark edges until later makes small mistakes easier to avoid.
Follow this general order when using your paint pots, but treat it as a guide rather than a strict rule. Begin by finding the palest numbered sections and painting those with a clean brush, allowing them to dry before adding another thin coat where the number still shows. Move on to mid-tones, then complete the deeper shades and larger outlines. Finish with tiny marks and narrow borders. The best starting point can vary with the image, the size of each section and your own pace. If you prefer a slower first session, choose one light colour and complete its visible areas across the canvas before moving on.
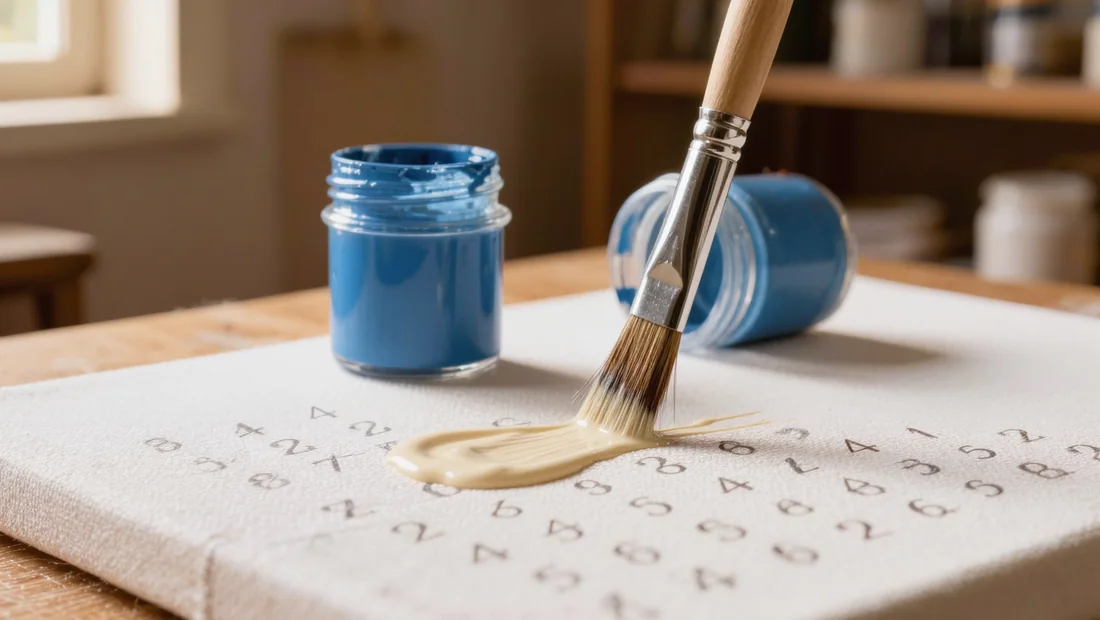
Why Light Colours First, and Dark Colours Last
The general rule is to apply pale shades before moving on to deeper tones. Areas painted with light acrylics often need two thin coats to cover the printed number cleanly. Painting them while the neighbouring sections are still unpainted gives you room to work up to the edges without dragging dark paint into a pale patch.
Pale paints also show smudges more easily. A small amount of darker colour on the brush can make a cream, light blue or soft grey area look muddy. Use a clean brush, take a small amount of paint, and allow the first coat to dry before adding the second. Thin coats keep the surface smoother and help the printed number disappear without creating a raised ridge.
Dark colours can usually wait because they cover printed numbers more readily, often in one coat. They are also useful for sharpening outlines and edges after the surrounding colour has dried. If you paint a dark section early, then quickly fill its pale neighbour, the wet paint can spread across the boundary or leave a dark stain in the lighter area. Working from pale to dark gives each section time to settle and leaves the strongest outlines for the final stages, when you can place them accurately against dry colour.
A simple painting order to follow
Follow these six steps: start with pale colours, move to mid-tones, add dark areas, and finish with fine details.
1. Line up the pots
Read the number on each paint pot and match it with the numbers on the canvas. Arrange the colours from palest to darkest, keeping the pots closed until you need them. This gives you a practical painting order without relying on the printed number sequence.
2. Paint the palest areas
start with the lightest colours across the whole canvas. Use a small amount of paint and apply a thin, even coat inside each numbered shape. Pale acrylic paint may need a second coat, so allow the first coat to dry before adding more.
3. Move to the mid-tones
Once the pale sections are dry to the touch, paint the medium shades. Work around the canvas in manageable areas, taking care not to drag a damp colour into a neighbouring pale section. Rinse and dry the brush when changing to a noticeably different colour.
4. Add the dark colours
paint the deep shades, shadows and broad outlines after the lighter areas have dried. Keep the brush lightly loaded near a boundary, then build coverage with a second thin coat if the canvas still shows through. This helps keep dark paint from spreading into adjoining light sections.
5. Finish the small details
leave tiny numbered spots, narrow lines and the finest marks until the larger areas are complete. Use the smallest suitable brush and check the pot number before each short application. These final marks often clarify edges and give the picture a cleaner finish.
6. Dry the canvas flat
Place the finished canvas flat on a clean surface and let the paint dry fully before framing it. Keep it away from dust, moisture and anything that could touch the wet surface. If you use paint-by-numbers accessories, clean and dry your brushes before storing them.

What to do when a number sits under a dark area
If a printed number sits beneath a dark area, paint the surrounding shade first and cover the number with two thin coats. A heavy layer can dry unevenly, leave ridges, or make the acrylic drag across the canvas. Load the brush lightly, work to the edges of the section, and allow the first coat to dry before adding the second.
When a dark section borders a light one, finish the pale section before opening the dark pot. This gives the light paint a clean base and reduces the chance of dark pigment being pulled into it. Keep the brush rinsed between pale and dark colours, then blot it until damp rather than wet. Excess water can thin the paint and make it harder to cover the printed number.
If the number still shows after the second coat, stop painting that area and let it dry fully. Acrylic paint can look translucent while wet, especially in lighter shades. Add another thin coat once the surface feels dry to the touch, using gentle strokes in the same direction. For a number beneath a dark area, use the matching dark pot after the nearby pale sections have dried, then tidy the border with the pale colour if the dark paint has crossed the line. A fine, clean brush from your kit can help with this final edge.
Should you paint in numerical order instead?
Paint pot numbers identify the colour assigned to each area; they do not prescribe the order of painting. A pot marked 1 corresponds to every section numbered 1, and pot 12 to those marked 12. You can begin with any number, although the recommended light-to-dark order usually gives cleaner results on a numbered canvas.
Numerical order can still be useful when you prefer a clear, methodical routine. Choose one pot, paint every matching section across the canvas, then move to the next number. This helps you keep track of finished areas and reduces the number of open pots on your work surface. Check the colour carefully before starting, since a single number may appear in several separate parts of the design.
The drawback becomes apparent where different colours meet. Numerical order may lead you to apply a dark colour beside an unpainted pale area, so keep the brush tip within the numbered section and use a smaller brush around the boundary. A practical hybrid is to group the pots by tone first, placing pale colours in one group and mid-tones and darks in another. Work through each group in light-to-dark order, then use the final dark pots for outlines and small details. This gives you the structure of numerical painting while preserving the cleaner edges that beginners often want from paint by numbers for adults.
Where on the canvas to start, and how to keep pale areas clean
Start at a corner or with a large block of one colour, then work across the canvas in a steady direction so your hand and tools stay away from wet paint.
- Choose a top corner if you tend to rest your hand on the canvas, and work from top to bottom so your hand doesn't drag across wet paint.
- Starting with a large, pale area can help you settle into the shapes and gives you room to practise your brush pressure before working on small details.
- Keep a rinse pot, a dry cloth and a second clean brush within reach, using the cloth to remove excess water before the brush returns to the paint.
- Rinse the brush when changing colours, especially before returning to white, cream, yellow or another pale pot, because even a trace of darker paint can spoil the shade.
- Keep the acrylic paint in its pot at its original consistency and never add water directly to it.
- Thin coats come from taking a small amount of paint on a well-shaped brush and spreading it evenly, rather than watering the pot down.
- If a pale area looks uneven after the first coat, let it dry fully before adding a second thin coat, since brushing wet acrylic can lift the layer underneath.
- Place the lid on each pot as soon as you finish with it, and wipe any paint from the rim before closing it so the pot remains easy to open.
- Between sessions, cover the canvas with clean paper or a dust-free sheet, or move it to a safe, flat place away from pets, food and direct heat.
- A small tray or the paint-by-number accessories you use for storage can keep pots, brushes and the rinse pot together without touching the wet canvas.

Finishing the painting once the colour order is done
Once every numbered area is covered, leave the canvas flat until the paint is fully dry before making any final checks or adding a frame. Acrylic paint may feel dry on the surface while thicker patches remain soft, so leaving it overnight is a sensible choice. Keep the canvas away from dust, moisture and direct heat while it dries.
Check the finished painting under a lamp held at a low angle to create raking light. This makes unpainted numbers, thin patches and small gaps easier to see. Match the printed number to the corresponding pot and apply a thin touch-up coat where needed. Allow each touch-up to dry before judging its coverage. Clean any paint from the canvas edge so it sits neatly in the frame.
If you added an optional frame when ordering your kit, wait until the canvas is completely dry and flat before fitting it. If you are using a personalised paint by numbers kit, follow the same light-to-dark order. Since its palette is based on your photo, some shades might require an extra coat for full coverage.
If you are ordering a kit for a future project, we dispatch orders within 48 hours, with free standard delivery across the UK and Ireland. When you're ready for your next project, browse our paint by numbers kits for adults to find the right canvas size.
Start with the palest colours, using thin coats and allowing each section to dry before painting beside it. This keeps lighter areas clean and makes dark outlines, shadows and fine details easier to place later. If a number shows beneath a dark section, finish the surrounding light colour first, then cover the number with the darker paint. Browse our Paint by Numbers for Adults collection for your next project.
Ready to start with a clean canvas?
Browse our adult paint by numbers kits, each with a pre-printed numbered canvas, numbered acrylic pots and brushes. Free delivery to the UK and Ireland, dispatched within 48 hours, with a 14-day cancellation right and a 1-year guarantee.
View Paint by Numbers for AdultsFrequently asked questions
Should I paint the background first or the subject?
Paint the lightest areas first, whether they are in the background or the subject. If the background is dark, leave it until the pale parts of the subject are dry. The tone dictates the order, not the position on the canvas. This reduces the chance of dark paint covering or muddying lighter sections.
Can I paint all the numbers of one colour at once?
Yes, you can paint every section with one colour in a single session when that colour is light. With darker paint, wait until nearby pale areas have dried fully. This keeps the edges clean and prevents a dark shade from smearing into light acrylic while you move around the canvas.
Why does the printed number still show through?
The printed number can show through because lighter acrylic paints have less opacity. Apply two thin coats, allowing the first to dry fully before adding the second. A thick coat can leave ridges or take longer to dry. Judge the coverage only after the paint has dried, as wet acrylic can look uneven.
Do I need to paint the outlines last?
Outlines and dark edges usually work best near the end. Paint the surrounding colour first and let it dry, then sharpen the boundary with a fine brush and a small amount of paint. This gives you a clearer edge and helps cover any small gaps left between adjoining sections.
Does the same order apply to a personalised photo kit?
Yes, work from lighter tones towards darker ones for a personalised photo kit. The palette comes from your photograph, so read the pot numbers first and sort them by tone. Begin with the palest colours, allow each area to dry, then add darker details and outlines once the main shapes are covered.
Related posts
 How to Tell If Paint Has Gone Bad: A Painter's Guide
 Paint by Numbers Tips YouTube Videos Miss
 How to Blend Paint on Paint by Numbers: A Studio Guide
 Paint by Numbers Paint Like Frida: A Practical Guide