 Free UK delivery


How to Blend Paint on Paint by Numbers: A Studio Guide
Yes, you can learn how to blend paint on paint by numbers by softening the join with a clean, slightly damp brush. Work while the paint is still wet for a gentle transition, or add thin layers once it has dried. Use very little water, choose a small soft brush, and mix close colours on a palette. If a pot runs low, a matching replacement acrylic or a small custom mix can finish the section without changing the whole design.
In short
- Blend on a paint by numbers canvas by working the join while both areas are still damp, or by feathering a thin layer of the lighter colour over the dry edge.
- Keep the paint the consistency of single cream: a barely damp brush, not a wet one, so the paint remains opaque enough to cover the printed numbers.
- Use a small flat or filbert brush for joins and a fine round brush for tight numbered areas; clean between colours to avoid muddying.
- If a pot runs low, thin a small amount of paint from the same numbered pot with water, rather than substituting a different colour, and paint thin layers to cover more area.
Can you blend paint on a paint by numbers canvas?
Yes, you can blend paint on a paint by numbers canvas, although the aim is usually a softer join between two numbered areas rather than a fully blended painting. The printed sections give you the shapes and colour placement, while your brushwork can reduce a sharp line where neighbouring colours meet. This works well if you are using a paint by numbers kit for adults and want a gentler transition without losing the structure of the picture.
There are two dependable ways to soften the boundary. With wet-on-wet blending, apply the two adjoining colours while both areas are still slightly damp, then use a clean, lightly loaded brush to touch the join. For a dry surface, use layering: apply a thin coat of the lighter colour over part of the dry edge, feathering it towards the darker section. A small, soft brush gives you more control than a large brush loaded with paint.
Keep the numbered shapes visible as a guide while you work. If every section were blended into the next, the planned forms would become less clear and the finished image could lose its intended detail. The printed numbers also need complete coverage, so very thin paint can leave marks showing through. Build coverage gradually where needed, allowing each coat to dry before adding another. This gives you room to soften a join while keeping the original design easy to recognise.

What you need before you start blending
Before blending, set up your supplied canvas, numbered acrylic paints and brushes, then keep a few simple tools beside you so you can work without having to pause along the boundary.
- Use the fine round brush for narrow sections, small corners and areas where a printed number needs careful coverage.
- Choose the small flat or filbert brush for the boundary between two numbered areas, as its wider edge can soften the transition with fewer strokes.
- Pour a little clean water into a small pot, using only enough to rinse the brush rather than soaking it.
- Keep a cloth or a sheet of kitchen paper nearby so you can wipe excess water and paint from the bristles before returning to the canvas.
- Place a scrap of card or spare canvas beside your work and test the colour, moisture and pressure there before touching the painted area.
- If the paint seems too thick, thin a small amount with a drop of water or a tiny amount of acrylic medium, mixing fully before adding more.
- Add no more than one drop at a time, because an overly wet mix can spread beyond the numbered section and leave weaker coverage.
- Keep the paint pots closed when you pause, and arrange them in number order so the correct colour is ready when you reach the boundary.
- You can find further ideas for simple tools and storage in our Paint by Numbers Accessories guide.
Wet-on-wet blending along the boundary, step by step
1. Paint the first area
Fill one numbered section with its matching acrylic paint, working towards the boundary. stop just short of the printed line so the edge remains clean and the paint layer stays even.
Use a small brush for narrow sections and keep the coat thin enough to remain damp for the next step. Work across only a few centimetres at a time.
2. Add the neighbouring colour
Load the brush with the paint for the adjoining number and place it beside the first colour while both areas are still damp. Keep the paint within the second section at first, leaving a small amount near the join ready to blend.
3. Draw the colours together
Use short, light strokes across the join to pull a little of each colour into the other. Move back and forth over the boundary without pressing hard, so the printed line stays covered as the colours soften.
Work from the painted area towards the join, then return with shorter strokes. A few passes are usually enough for each small stretch.
4. Wipe the brush between passes
Wipe the brush on a clean, slightly absorbent cloth or kitchen paper before changing direction or adding another pass. This removes excess paint and stops you from dragging a third, muddy colour along the edge.
5. Continue in short stretches
Blend a few centimetres at a time, then move to the next section while the paint is fresh. Keep checking the surface from different angles so you can see whether the join is becoming softer without lifting the paint.
6. Leave the canvas flat
stop when the transition looks even and leave the canvas flat to dry. Do not return to a half-dry join, as the brush can lift the surface, expose the printed numbers or leave a patchy edge.

Layering for a soft transition when the paint is dry
When both numbered areas are dry, soften the boundary with thin, feathered layers of the lighter colour.
Let the base dry
leave both painted sections until the surface feels dry and no longer looks cool or shiny. Adding a new layer too soon can lift the colour underneath and create a muddy ridge.
Check the printed boundary before you begin. Keep the join visible enough to guide your brush, especially on a detailed design such as a fantasy paint by numbers canvas.
Choose the lighter colour
Use the lighter of the two numbered paints for the softening layer. Load a small paint-by-numbers brush, then wipe most of the paint off against the rim of the pot or on a clean palette.
The brush should be barely damp. Excess water can make the acrylic run, weaken its coverage and leave the printed number visible underneath.
Feather the edge
Apply short, light strokes across the darker edge, extending only a few millimetres into that section. Keep the strokes close to the join and vary their length so the transition does not form a second hard line.
Allow the first pass to dry, then add one or two more thin passes. Several light layers improve opacity while keeping the surface level. A thick coat can leave a raised edge, cover nearby details unevenly and pull away as it dries.
Stop at a softened join
Stop when the boundary looks gently softened from normal viewing distance. The aim is a cleaner transition at the numbered join, with the surrounding areas retaining their original colour. Carrying the lighter paint across the whole section can flatten the design and create an unwanted gradient.
Getting the paint consistency right
Aim for a consistency like single cream: the paint should hold a soft peak on the brush, then flow off it in a smooth line. This gives enough coverage to hide the printed number while allowing you to soften the join between two areas. Acrylic paint from a fresh pot can be thicker than this, especially around the edges where it has begun to dry.
Loosen thick paint with a slightly damp brush. Load the brush, work the paint in the pot, and stir until it moves more freely. If it still drags, add water one drop at a time and mix each drop in fully before checking again. A wet brush can dilute the colour too quickly, so squeeze out excess water first. Add water to the paint in its pot or on a palette, never directly onto the canvas.
Test the mixture on a piece of scrap card before returning to the numbered area. If the card shows through, the paint is too thin; it may fail to hide the printed number or bleed into a neighbouring section. If the brush catches, leaves ridges, or pulls up the layer underneath, the paint is too thick. Adjust in small amounts, then use the same test for each colour. This simple check is especially useful for kids' paint by numbers kits and for beginners, where steady coverage matters more than speed.
How to get more paint for paint by numbers when a pot runs low
When a pot runs low, you can often finish the section by using thinner coats and reserving the remaining paint for the areas where it is most needed.
- Paint the colour in two or three thin layers instead of applying one heavy coat, allowing each layer to dry first so the same pot covers more canvas.
- Use the largest areas of that number first, as this shows how far the paint will go and leaves any shortage for smaller details that are easier to cover carefully.
- When only a little paint remains, add a single drop of water to the pot and work it through with the brush until the mixture is smooth, taking care to avoid making it runny or transparent.
- Keep the brush lightly loaded and spread the thinned paint evenly within the printed boundary, as a heavy brushful can use more paint than the section needs.
- If the pot is genuinely empty, buy a matching acrylic colour from a craft shop and compare it with the dry paint on the canvas before continuing; acrylic may look different while wet.
- Write the number beside the empty pot or on a separate note, and take the pot or a small dried paint sample with you when matching the colour later.
- For a custom paint by numbers kit, record any numbers that ran low while you paint, so you can check those colours and prepare suitable replacements for your next personalised design.

Finishing touches: keeping the joins clean
Check the joins from a step back before making another correction. At arm’s length, a slight change in colour can look softer, while a heavy dark line may become more obvious. Turn the canvas in good light and look for gaps, visible printed numbers, raised paint, or colour spreading outside the numbered area.
If an edge looks muddy, let the paint dry fully first. Repaint the smaller numbered area with its correct colour, keeping the brush fairly dry and working towards the join. Feather the fresh paint lightly into the neighbouring colour with a clean, almost dry brush. Several thin layers give you more control than one thick coat. Rinse the paint by numbers accessories brush between colours, then remove excess water on a paper towel. A brush carrying leftover paint can change the next colour and make a clean join muddy again.
Leave the completed canvas flat until every section feels dry, including any thicker patches. You can apply a suitable varnish afterwards if you want extra surface protection, following the varnish maker’s instructions and testing it on a small painted area first. A frame is optional and can help keep the canvas neat for display. Keep your order details, as the kit comes with a one-year guarantee alongside your rights under the Consumer Rights Act.
Our picks

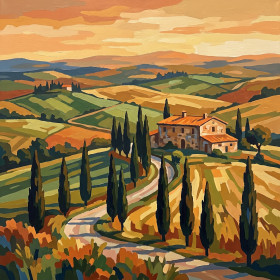
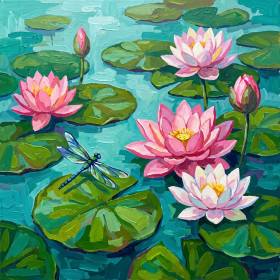
The most useful habit is to keep each join controlled: use a small flat or filbert brush with paint the consistency of single cream, blend while both colours are damp, and clean the brush before changing shade. For a dry edge, feather a thin layer of the lighter colour across it. Use a fine round brush for tight spaces, and thin matching paint slightly when a pot runs low. Browse our paint by numbers kits for adults for your next project.
Ready to try a softer edge?
Browse our adult paint by numbers kits, pre-printed numbered canvas, numbered acrylics and brushes, with free delivery to the UK and Ireland and dispatch within 48 hours. Choose from 12 canvas sizes, add a frame if you like, or send us a photo for a personalised kit.
View Paint by Numbers for AdultsFrequently asked questions
Do you add water to paint by numbers paint for blending?
Yes, add water one drop at a time and stir it in fully before adding more. Aim for a single-cream consistency, so the paint flows across the join while still covering the printed number. Test a little on spare paper first, as too much water can make the colour thin and difficult to control.
Which brush is best for blending on a paint by numbers canvas?
A small flat brush or filbert works best for softening joins between larger painted areas. Use a fine round brush for tight numbered sections and small corners. Wipe the brush between colours, then load only a little paint. Short, light strokes give you more control than pressing the bristles into the canvas.
Can you blend two numbers that are not next to each other?
Blend two numbers only when the design calls for a gradual transition between them. The numbered shapes provide the structure of the image, so joining separate areas can weaken the intended form. Keep each colour within its section unless a nearby edge, shadow or highlight clearly needs a softened transition.
What if my paint dries before I can blend the join?
Use thin layers when the join has already dried. Feather a small amount of the lighter colour over the edge, allow it to dry, then repeat for two or three passes. Keep each coat narrow and translucent, gradually softening the boundary without covering the surrounding details or changing the shape of the section.
How do you get more paint for a paint by numbers kit?
Stretch the remaining paint by applying thin, even layers and revive thickened paint in the pot with a single drop of water. Stir thoroughly before using it. If the pot is genuinely empty, match the colour with craft acrylic, test it beside the existing paint, and write the original number on the replacement pot.
Related posts
 How to Tell If Paint Has Gone Bad: A Painter's Guide
 Paint by Numbers Tips YouTube Videos Miss
 Which Colour to Paint First on a Paint by Numbers Kit
 Paint by Numbers Paint Like Frida: A Practical Guide